My #1 tip for a successful garden
Healthy plants start with healthy soil -- here's how to get it right
Hi, guys!
One of the most important (and often overlooked) factors in plant health is soil pH. If your plants are struggling despite getting plenty of water and fertilizer, your soil’s pH might be to blame.
Soil pH, measured on a 14-point scale, indicates the degree of acidity or alkalinity of your soil. A reading of 7 is neutral. Readings below 7 are acidic; those above 7 are alkaline.
But pH isn’t a one-for-all factor: every plant has its own preferred pH range. If the soil’s pH is outside the target range for the specific type of plant you are growing, it won’t be able to absorb sufficient nutrients —whether naturally occurring or from added fertilizer. That can lead to stunted growth, yellow leaves and poor production.
For example, in order to thrive, carnations require a soil pH range of 6.7-6.9; turfgrass needs a reading between 6.3 and 6.8; tomatoes, 6.2-6.8; rhododendrons & azaleas, 4.5-6.0; blueberries, 4.5-5.5.
In some cases, an imbalanced pH can even make certain minerals toxic to plants.
It’s easy to test your soil’s pH -- and spring -- before planting -- is a good time to do it.
Dig up about a tablespoon of soil from each of three separate spots in a given area (the front lawn, a raised bed or flower border, for example -- not from the whole property), then mix those three tablespoons together in a bowl or a bag. We do this to even out variations that may occur in samples taken just a few feet apart.
There are several ways of obtaining a reading.
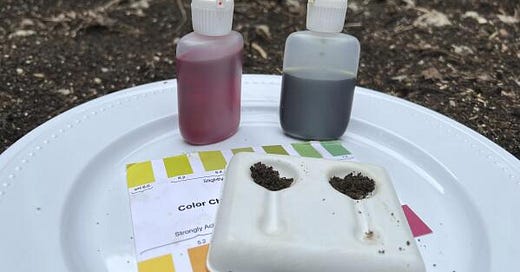
Personally, I use the DIY test kits that involve applying a few drops of a chemical dye on a soil sample, waiting a minute or so, and then comparing its changed color to a chart to obtain a pH reading.
Other methods include test strips (dip them in a mix of soil and water, and they’ll change color based on the pH level), electronic meters (stick a probe into the soil and get an instant digital reading) or lab testing (for the most accurate results, send a soil sample to your local cooperative extension office. They’ll not only test the pH but also provide recommendations for adding amendments if that’s called for. You can find your nearest extension office here).
If your testing reveals the pH is out of range for the plants you want to grow, you can adjust it by adding elemental sulfur or peat moss to lower it or incorporating ground limestone to raise it.
For best results, work amendments 8-12 inches into the soil before planting. If your garden is already planted, sprinkle the products on the surface and water it in well.
Soil conditions often change over time, so it’s a good idea to retest every couple of years.
And whatever you do, don’t automatically apply amendments (like lime to the lawn) as a matter of routine. And don’t let your landscaper, either. Always test first.
📬 Ask Jessica
DEAR JESSICA: When is the best time to trim and reshape azaleas and holly bushes? I’ve been doing it when they get too big, usually in the summer. — Al Quackenbush
Keep reading with a 7-day free trial
Subscribe to The Weekly Dirt with Jessica Damiano to keep reading this post and get 7 days of free access to the full post archives.


